Have you ever stumbled upon a craft so captivating, it not only piques your curiosity but also promises a world of creativity and relaxation? Welcome to the enchanting world of diamond painting, a hobby that has taken the crafting community by storm. Whether you’re a seasoned artist or someone looking for a new pastime, diamond painting offers a unique blend of simplicity and artistry that appeals to all ages. But what exactly is diamond painting, and how do you get started? Let’s dive in and discover the sparkle of this beloved craft.
What is Diamond Painting?
Diamond painting is a creative craft that falls somewhere between cross-stitch and paint-by-numbers. Crafters apply tiny, shiny resin diamonds to a canvas that’s printed with a corresponding map. Each diamond’s color corresponds to a symbol on the canvas, guiding the artist on where to place the gems. The result? A stunning, mosaic-like piece of art that shimmers and sparkles with every glance.
Why Try Diamond Painting?
This craft is not just about the end product; it’s about the journey. Diamond painting is known for its meditative, therapeutic benefits, offering a peaceful escape from the hustle and bustle of daily life. It enhances focus, reduces stress, and provides a sense of accomplishment once you see your artwork come to life, one diamond at a time.
Getting Started: The Essentials
To embark on this glittering adventure, you’ll need a few key items. Luckily, everything you need to begin can be found in comprehensive kits designed for both novices and experienced crafters alike. Here’s a glimpse into what these kits include:
1. Diamond Painting Starters Kit
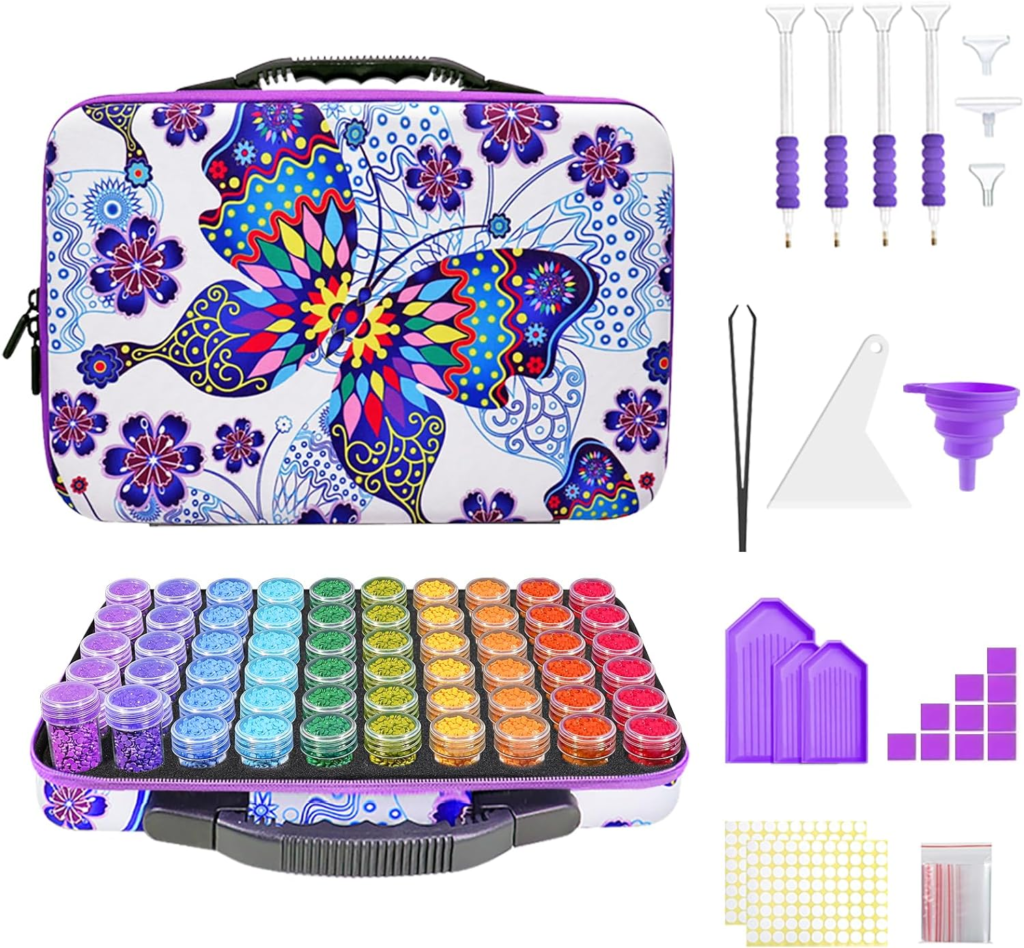
Ideal for beginners, the Diamond Painting Starters Kit comes equipped with all the essentials. It features diamond painting pens, allowing you to work with multiple colors simultaneously, which is especially helpful for large areas of the same color. The kit includes trays and wax for picking up and placing diamonds, as well as storage accessories like bags and labels, making organization a breeze. With these tools, managing your diamonds becomes effortless, enhancing the overall crafting experience.

2. 5D Diamond Painting Accessories & Tools Kits
For those ready to take their crafting to the next level, the 5D Diamond Painting Accessories & Tools Kit is a treasure trove. This kit is tailored for adults and includes advanced tools like a diamond painting roller for pressing diamonds firmly onto the canvas, ensuring they stay put. Tweezers, a storage box, and a variety of pens and trays further streamline the process, making your crafting session as enjoyable as possible. The inclusion of sticky wax and bags ensures that you have everything at your fingertips for a seamless diamond painting experience.
Embarking on Your Diamond Painting Journey
Now that you’re familiar with what diamond painting is and the essential kits to get you started, why not dive into this sparkling world? Whether you choose a starter kit to ease into the craft or an advanced set to elevate your experience, diamond painting promises to be a rewarding and relaxing hobby. With each diamond placed, you’ll not only bring a beautiful piece of art to life but also enjoy a moment of calm and creativity in your day.
So, are you ready to unleash your inner artist and explore the shimmering possibilities of diamond painting? Grab a kit, and let the adventure begin!
Now, onto the step-by-step guide:
Step 1: Unpack Your Kit
First things first, lay out all the items from your kit. Typically, you’ll find a canvas, resin diamonds (also known as drills), a diamond applicator pen, a tray, wax, and sometimes tweezers. Take a moment to familiarize yourself with these components. Each plays a vital role in the creation of your diamond painting.
Step 2: Prepare Your Workspace
Choose a comfortable, well-lit area to work in. A clean, flat surface is ideal. Organize your materials so everything is within easy reach. This preparation step can significantly enhance your crafting experience, making it more enjoyable and efficient.
Step 3: Understand Your Canvas
Your canvas is printed with symbols that correspond to diamond colors. Before you start, take a few minutes to study this guide. It will be your roadmap as you place each diamond. Some crafters find it helpful to mark sections of the canvas with a marker for easier navigation.
Step 4: Peel Back the Canvas Cover
Your canvas comes with a protective film to keep the adhesive fresh. Peel back a small section of this cover, but don’t remove it entirely. Working in sections helps prevent the adhesive from getting dirty or drying out.
Step 5: Dive Into Diamond Placement
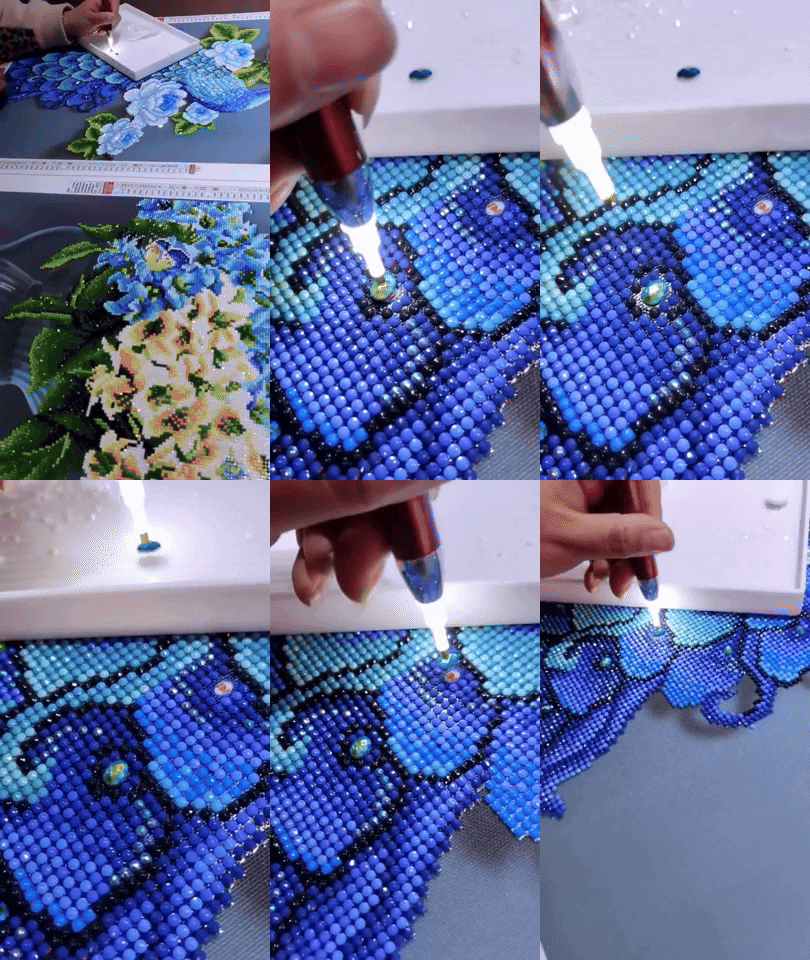
Pour a small number of diamonds into the tray. Gently shake it to flip the diamonds right side up. Dip the tip of your applicator pen into the wax. This helps you pick up the diamonds. Then, press the pen to the top of a diamond to lift it and carefully place it on the corresponding symbol on the canvas. Repeat this process, one diamond at a time.
Step 6: Use Your Tools
Depending on your kit, you might have different tools to assist you. The tweezers are perfect for correcting placements or picking up dropped diamonds. If you have a multi-applicator pen, it allows you to pick up several diamonds at once, speeding up the process for large areas of the same color.
Step 7: Press Down the Diamonds
Once you’ve placed diamonds in a section, gently go over them with a roller (if included in your kit) or a flat object to press them firmly onto the canvas. This step ensures they’re securely attached and gives your artwork a more finished look.

Step 8: Progress Section by Section
Continue peeling back the protective film, filling in sections with diamonds, and pressing them down as you go. It’s a relaxing process, so take your time and enjoy the journey of creating your artwork.
Step 9: Seal Your Masterpiece
After completing your painting, you might want to seal it. While not always necessary, a sealant can protect your artwork, prevent diamonds from falling off, and enhance its longevity. You can find diamond painting sealants online or use a clear craft sealant.
Step 10: Display Your Artwork
Congratulations! You’ve completed your diamond painting. Now, it’s time to display your masterpiece. Whether you frame it, mount it on a foam board, or find another creative way to show it off, your artwork is sure to dazzle and bring joy to any space.
That’s it! You’ve just created your own masterpiece.

